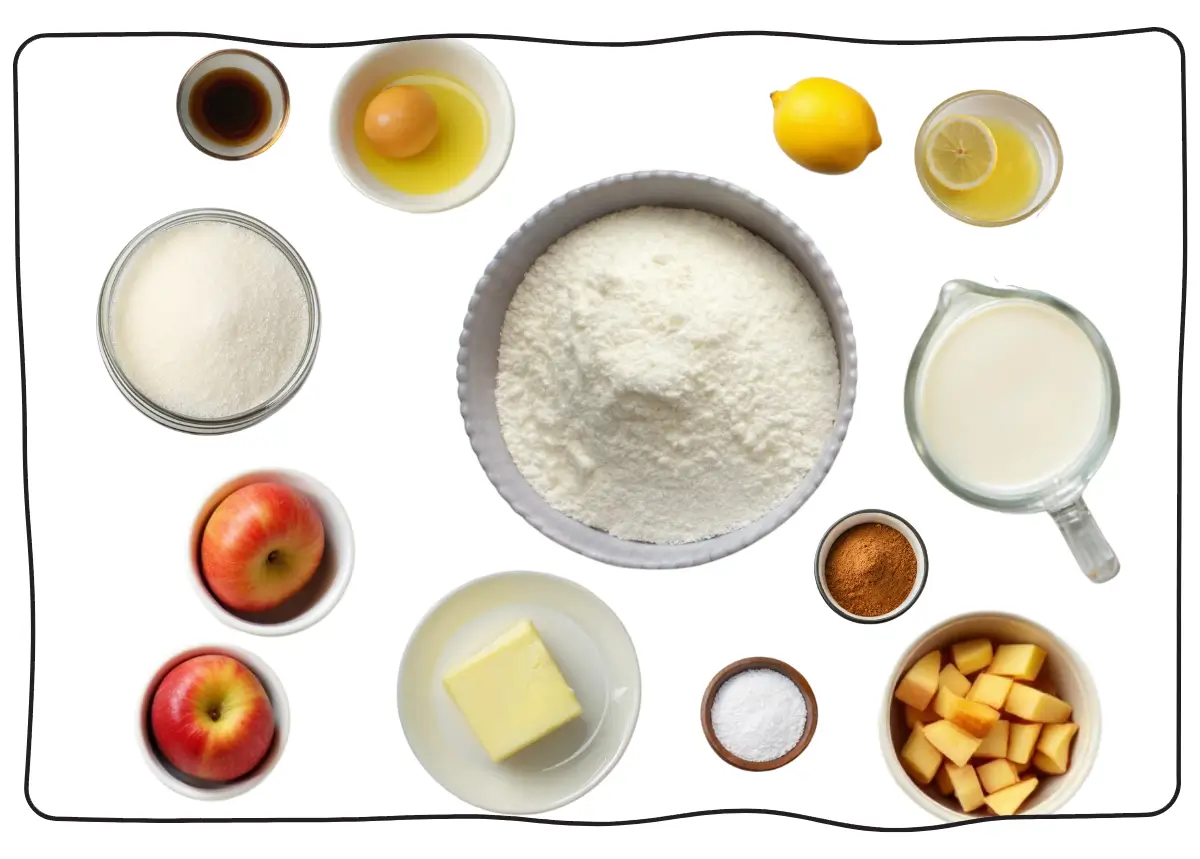
In this guide, I’ll share all you need to know about making amazing apple hand pies. You’ll learn to pick the best apples and create a flaky crust. Prepare for a baking journey that will make your desserts unforgettable and create lasting memories.
Table of Contents
Why You’ll Love These Classic Apple Hand Pies
Apple hand pies are more than just a sweet treat. They bring joy to any event. These pies are easy to make, taste amazing, and fill you with baking joy.
Perfect for Picnics and Packed Lunches
Apple hand pies are super easy to take on the go. They don’t need plates or forks like regular pies do. They fit perfectly in lunch boxes or backpacks, making eating on the move a breeze.
- Easy to transport
- No utensils needed
- Mess-free eating experience
Make-Ahead Friendly Option
Busy bakers will love that these pies can be made ahead. You can assemble them early and keep them in the fridge or freezer. This makes planning meals and parties a lot simpler.
Portion-Controlled Desserts
These pies are ideal for those watching their sugar or practising mindful eating. Each pie is a single serving, so you can enjoy a sweet treat without feeling guilty.
- Controlled portion sizes
- Built-in serving control
- Guilt-free dessert option
Essential Ingredients for Perfect Hand Pie Filling

Making the perfect apple hand pies starts with picking the right filling ingredients. The secret to a great hand pie is the mix of flavours and textures. These turn simple ingredients into a special dessert.
When making your hand pie, remember these key ingredients:
- Apples: Pick firm, tasty varieties like Granny Smith or Honeycrisp
- Granulated sugar for sweetness
- Ground cinnamon and nutmeg for warm spices
- Cornstarch or flour as a thickening agent
- A touch of lemon juice brightens the flavour
Use a mix of sweet and tart apples for a rich flavour. The cornstarch keeps the filling from getting soggy. It makes sure your pies stay just right.
Adding a pinch of salt can also improve the taste. It balances the fruit’s sweetness.
Try different spice amounts to make your hand pie your own. Start with a bit of cinnamon and nutmeg. Taste and adjust until it’s just right. You want a filling full of flavour, like a classic apple pie, but easy to hold.
Creating the Perfect Flaky Pie Crust From Scratch
Mastering pie crust is key for a great apple hand pie. The secret is in the right mix of ingredients and technique. I’ve learned that making perfect pie dough is both a science and an art.
Cold Butter Technique Tips
Cold butter is essential for a flaky crust. Always chill your butter in the freezer for 15 minutes before baking. Here are some tips:
- Cut butter into small, uniform cubes
- Work quickly to prevent warming
- Use a pastry cutter or freeze your food processor blade
Achieving the Right Dough Consistency
Dough consistency is critical for your apple hand pie. Aim for a texture like coarse breadcrumbs. The goal is visible butter chunks for flaky layers.
Rolling and Folding Methods
Professional bakers use rolling and folding to create layers. Here’s my method:
- Roll dough into a rectangular shape
- Fold into thirds like a letter
- Rotate 90 degrees
- Repeat the folding process 2-3 times
This technique makes a layered, crisp crust. It takes your homemade hand pies to the next level.
Step-by-Step Guide to Apple Hand Pies
Making delicious apple pie hand pies is simpler than you think. I’ll guide you through making tasty hand-fruit pies. They’ll wow your family and friends.
Let’s break down making apple pie hand pies into manageable steps:
- Prepare the Filling
- Dice fresh apples into small, uniform pieces
- Mix with cinnamon, sugar, and a pinch of salt
- Let the mixture sit to release natural juices
- Roll Out the Dough
- Roll chilled pie dough to 1/8-inch thickness
- Cut into 4-inch rounds using a cookie cutter
- Keep dough cold to maintain flakiness
- Assemble Hand Pies
- Place 2 tablespoons of apple filling in the center of each round
- Fold dough over to create a half-moon shape
- Crimp edges with a fork to seal
- Bake to Perfection
- Brush tops with egg wash for golden color
- Sprinkle with raw sugar for extra crunch
- Bake at 375°F for 20-25 minutes
Follow these simple steps to make irresistible hand-fruit pies. The secret is patience and paying close attention to detail.
Best Apple Varieties for Hand Pies
Choosing the right apples is key to excellent apple hand pies. The perfect apples will make your pies burst with flavour and have the right texture. Let me help you pick the best apples for your baking.
Sweet vs. Tart Apples
Balance is essential when making apple hand pies. Sweet apples like Fuji and Gala add natural sweetness. Tart apples like Granny Smith bring a bright, tangy taste. Mixing these apples creates a complex flavour.
- Sweet Apples: Golden Delicious, Honeycrisp, Fuji
- Tart Apples: Granny Smith, Bramley, Pink Lady
Seasonal Selection Guide
Fresh apples make your hand pies taste better. Fall is the best time for apples, with Jonagold and Braeburn at their peak. Local farmer’s markets have the freshest, highest-quality apples.
Mixing Apple Varieties
Mixing different apples adds depth to your pies. Try a sweet Honeycrisp with a tart Granny Smith for a great mix. Experiment with 2-3 types to find your favourite.
- Aim for a 60/40 sweet-to-tart ratio
- Chop apples into uniform pieces
- Consider apple texture and baking characteristics
Tips for Sealing and Crimping Your Hand Pies
Creating the perfect apple hand pie recipe is more than just the filling. It’s also about sealing and crimping. A well-sealed pie keeps the filling inside, avoiding leaks and looking great.
Here are some key steps for sealing your hand pies:
- Egg Wash Technique: Brush the edges with beaten egg to help the dough stick together
- Use a fork to create a classic crimped edge that locks in the filling
- Leave a small border around the edges for proper sealing
My top method to stop filling leaks involves three steps:
- Trim edges cleanly with a sharp knife
- Press edges firmly with fingertips
- Use a gentle fork crimp around the entire perimeter
For a fancy look, try different crimping styles. You can make a rope-like edge or a scalloped border with a spoon. These details not only look good but also seal your pies well.
Chilled dough is best for sealing. Chill your hand pies in the fridge for 15 minutes before baking. This keeps the edges crisp and sealed.
Creative Variations and Flavor Combinations
Turning traditional apple hand pies into exciting dishes opens up a world of flavours. My love for handheld pies has led me to try unique tastes. These new flavours make the classic apple hand pies even better.
Caramel Apple Version
The caramel apple version takes these pies to new heights. I drizzle homemade caramel sauce into the apple filling before sealing. This adds a rich flavour that makes the pie truly special.
Spice Blend Options
Spices are key to making memorable apple hand pies. My top picks include:
- Classic cinnamon and nutmeg blend
- Warming cardamom and ginger mix
- Adventurous chai-inspired spice combination
- Unexpected lavender and vanilla pairing
Adding Extra Ingredients
Adding more to your apple hand pies recipe can make them even better. Try adding ingredients for texture and complexity:
- Toasted pecans for crunch
- Dried cranberries for tartness
- *Bourbon* for depth
- Crystallized ginger for heat
Each addition makes the pies unique, showing off your creativity. Don’t be afraid to try new things. The best surprises often come from unexpected mixes!
For an extra kick of cinnamon flavor, try adding a drizzle of homemade cinnamon simple syrup to your filling or serve it as a dip.
Common Mistakes to Avoid When Making Hand Pies
Making perfect apple pie hand pies can be tricky, even for experienced bakers. I’ve learned some valuable lessons through my hand-pie recipes. These lessons can help you avoid common pitfalls.
One of the most frequent mistakes is overfilling. This tempting error can lead to messy, burst pastries. They lose their delicious filling during baking. Here are key mistakes to watch out for:
- Dough Temperature: Working with warm dough makes it challenging to handle and shape your apple pie hand pies
- Skipping the chilling process for your pastry dough
- Using wet or improperly prepared apple fillings
- Incorrect sealing techniques
Temperature control is key in hand pie recipes. Keep your butter cold and work quickly when preparing the dough. I recommend chilling your prepared hand pies for at least 15-20 minutes before baking. This helps them maintain their shape and create a flakier crust.
Another critical error is improper apple preparation. Choose apples that aren’t too watery. Consider pre-cooking your filling to reduce excess moisture. This step ensures your hand pies stay crisp and prevent soggy bottoms.
Sealing techniques are also essential. Use a fork to crimp edges firmly. Always cut small vents to allow steam to escape during baking.
Storage Tips and Reheating Instructions
Keeping your homemade apple hand pies fresh is key. Whether you’ve just baked or have leftovers, the proper storage and reheating can preserve their taste and texture.
For short-term storage, keep your pies at room temperature. Here’s what to do:
- Store in an airtight container
- Keep away from direct sunlight
- Consume within 1-2 days for best quality
Refrigeration is excellent for extended storage. When storing in the fridge:
- Wrap each pie individually in plastic wrap
- Place in a sealed container
- Refrigerate for up to 5 days
Freezing is ideal for long-term storage. To freeze apple hand pies:
- Fabulous pies entirely before freezing
- Wrap each pie in parchment paper
- Place in a freezer-safe bag
- Freeze for up to 3 months
Reheating needs a gentle touch to keep the crust crispy and filling warm. Use an oven for the best results. Preheat to 350°F and warm your pies for 10-15 minutes. For frozen pies, thaw at room temperature before reheating.
Pro tip: A quick brush of egg wash before reheating can make your pies taste freshly baked.
Serving Suggestions and Accompaniments
I enjoy finding new ways to present apple hand pies. My top choice is to serve them with vanilla bean ice cream or whipped cream. The cold cream and warm pie make a perfect pair, mixing temperatures and textures.
Try drizzling caramel sauce or sprinkling powdered sugar on the pies for fancy events. It turns them into a special treat. You can also set up a topping bar with nuts, cinnamon sugar, or salted caramel sauce. This lets everyone make their pie.
At fall parties, serve the pies warm on a wooden board with apples and cinnamon sticks. It’s a beautiful way to show off the pie’s flavours and looks.
Pro tip: Wrap pies in parchment paper for potlucks or picnics. It’s easy to carry and adds a personal touch. Remember, how you
PrintApple Hand Pies
These Apple Hand Pies are a delightful twist on classic apple pie, offering a portable and mess-free treat for any occasion. With a flaky, buttery crust and a warm, spiced apple filling, these hand pies are perfect for picnics, lunch boxes, or simply enjoying as a sweet snack. This recipe includes tips for a perfectly sealed crust, creative variations, and storage instructions to keep your pies fresh and delicious.
- Prep Time: 30 minutes
- Cook Time: 25 minutes
- Total Time: 55 minutes
- Yield: 10 hand pies 1x
- Category: Dessert
- Method: Baking
- Cuisine: American
- Diet: Vegetarian
Ingredients
For the Pie Crust:
- 2 ½ cups all-purpose flour
- 1 teaspoon salt
- 1 tablespoon granulated sugar
- 1 cup unsalted butter, chilled and cubed
- 6–8 tablespoons ice water
For the Apple Filling:
- 2 medium apples (Granny Smith, Honeycrisp, or a mix), peeled, cored, and diced
- ¼ cup granulated sugar
- 2 tablespoons light brown sugar
- 1 tablespoon cornstarch
- 1 teaspoon ground cinnamon
- ¼ teaspoon ground nutmeg
- 1 tablespoon fresh lemon juice
- Pinch of salt
For Assembly:
- 1 large egg, beaten (for egg wash)
- 2 tablespoons raw sugar (optional, for topping)
Instructions
Prepare the Pie Crust:
- In a large bowl, whisk together flour, salt, and sugar.
- Cut in the chilled butter using a pastry cutter or food processor until the mixture resembles coarse crumbs.
- Gradually add ice water, 1 tablespoon at a time, mixing until the dough just comes together.
- Divide the dough into two discs, wrap in plastic wrap, and refrigerate for at least 1 hour.
Prepare the Apple Filling:
- In a medium bowl, toss diced apples with granulated sugar, brown sugar, cornstarch, cinnamon, nutmeg, lemon juice, and a pinch of salt. Let the mixture sit for 10-15 minutes to release natural juices.
Roll Out the Dough:
- Preheat the oven to 375°F (190°C). Line a baking sheet with parchment paper.
- On a lightly floured surface, roll out the chilled dough to 1/8-inch thickness. Cut into 4-inch rounds using a cookie cutter or small bowl.
Assemble the Hand Pies:
- Place about 2 tablespoons of apple filling in the center of each dough round.
- Fold the dough over the filling to create a half-moon shape.
- Press the edges with a fork to seal and transfer to the prepared baking sheet.
Finish and Bake:
- Brush each pie with beaten egg and sprinkle with raw sugar for a golden finish.
- Cut small vents on the top of each pie to release steam.
- Bake for 20-25 minutes, or until the crust is golden brown. Cool slightly before serving.
Notes
- Storage Tips: Keep at room temperature for up to 2 days or refrigerate in an airtight container for up to 5 days. For longer storage, freeze for up to 3 months.
- Reheating Instructions: Reheat in a 350°F oven for 10 minutes to restore crispiness.
- Creative Variations: Add caramel sauce to the filling, or try mixing in dried cranberries or toasted pecans for added texture and flavor.
- Pro Tip: Chill the hand pies in the refrigerator for 15 minutes before baking to prevent the crust from spreading.
FAQs about Apple Hand Pies
Are hand pies and empanadas the same?
Not exactly. While both are handheld pastries with fillings, empanadas typically have a savory filling and are popular in Latin American cuisine. Hand pies, on the other hand, often have sweet fillings, like fruit, and are more common in American baking.
How do you keep hand pies from getting soggy?
To avoid soggy hand pies, use firm, less juicy apples and thicken the filling with cornstarch. Make sure the dough is cold before baking, and always cut small vents to release steam.
Should apples be cooked before making apple pie?
Cooking apples before baking helps release excess moisture, ensuring your pie doesn’t become watery. It also enhances the flavor and ensures the apples soften evenly during baking.
Why are Costco apple pies so good?
Costco apple pies are loved for their generous apple filling, perfect balance of sweetness and spice, and flaky crust—all made with quality ingredients. Plus, they’re baked fresh daily in large batches to maintain consistency.
What is another name for hand pie?
Hand pies are also known as turnovers, pasties, or pocket pies, depending on the region and cultural variations.


