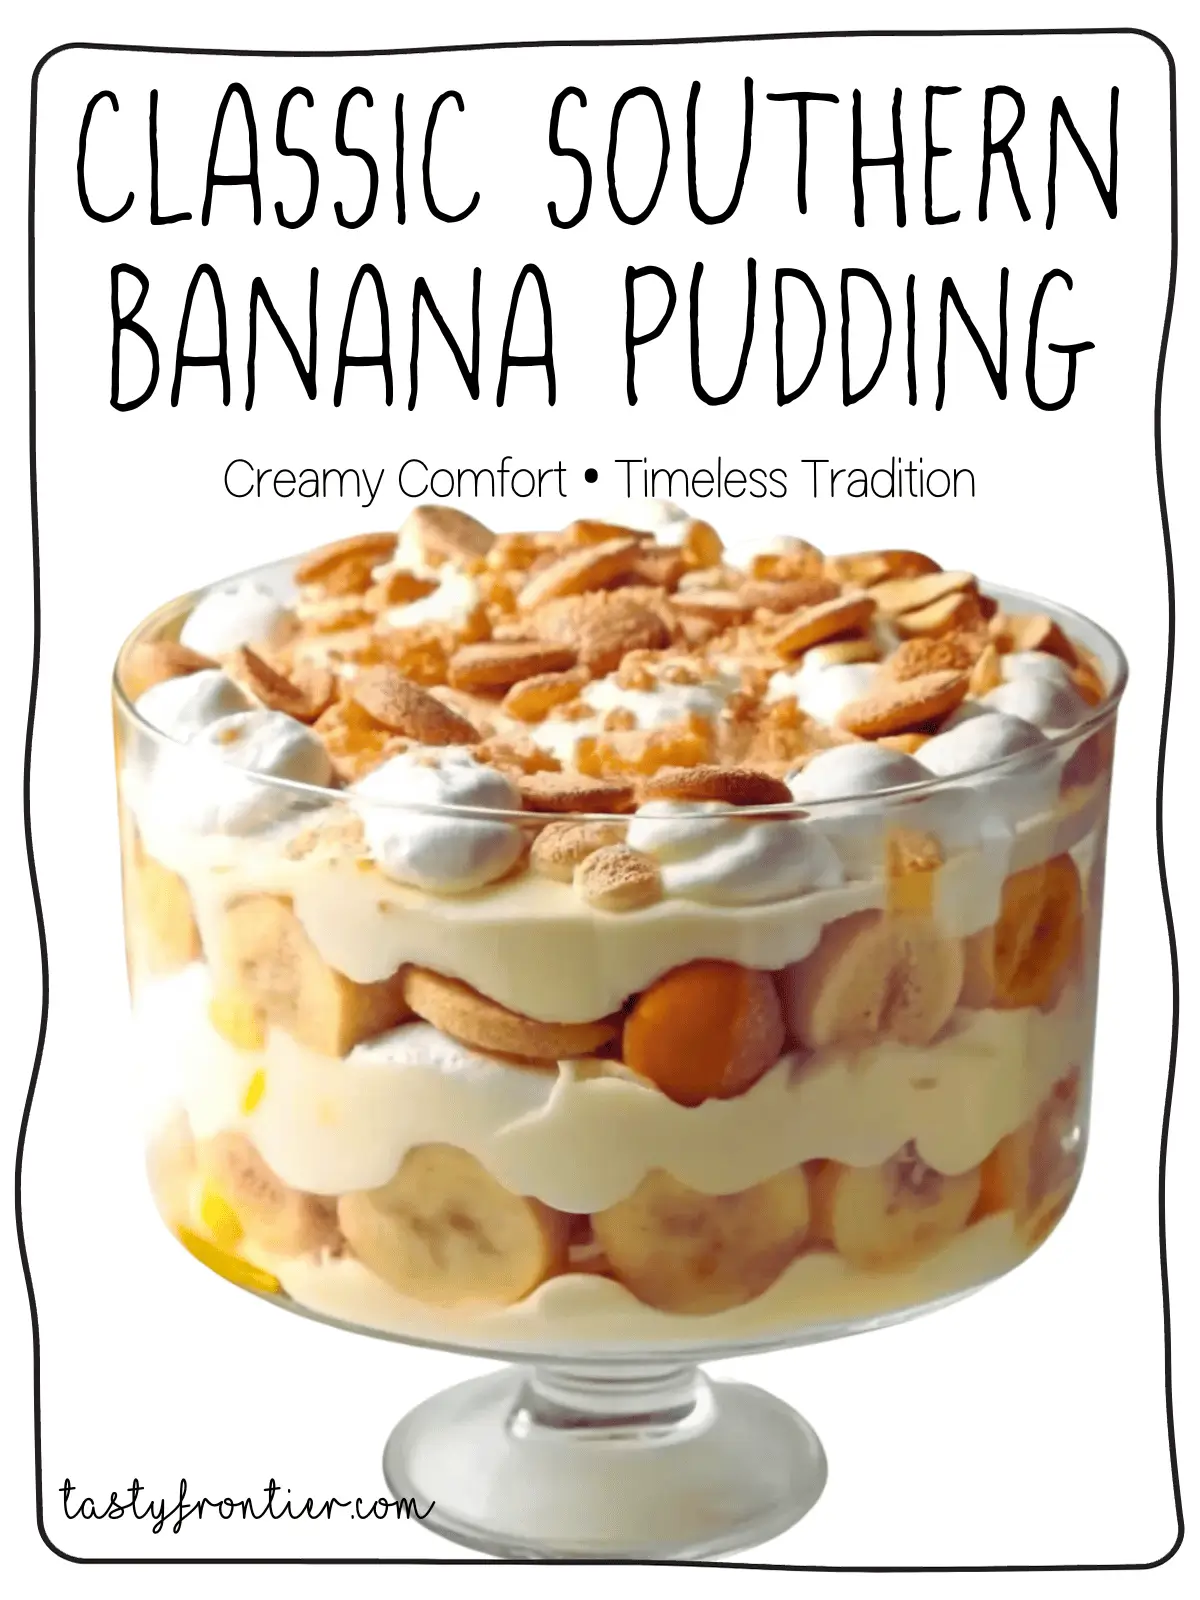
I love banana pudding, a classic Southern dessert. Its history is fascinating to me. I’ve tried many recipes, but the traditional one is my favorite. It mixes creamy pudding, vanilla wafers, and fresh bananas for a delicious treat. What I enjoy most is how easy it is to make. The combination of vanilla wafers, bananas, and creamy pudding feels comforting. It’s perfect for any occasion. In this article, I will share my favorite banana pudding recipe. It’s a simple version that keeps the traditional flavors.
Table of Contents
My Love Affair with Southern Banana Pudding
I still remember my first taste of banana pudding. It’s a classic Southern dessert loved for decades. Creamy pudding, bananas, and vanilla wafers were instant love. My love for it grew as I grew older, leading me to try new banana pudding ingredients and create my own recipe.
Banana pudding has a rich history in the South, dating back to the early 1900s. The traditional recipe for banana pudding with vanilla wafers is a classic. But adding my twist makes it unique. After years of experimenting, I’ve made an easy banana pudding recipe that wows everyone.
For another Southern classic, try our Cinnamon Sugar French Toast Muffins Recipe—a delightful breakfast treat that’s just as comforting!
Why This Recipe Holds a Special Place in My Kitchen
Banana pudding is more than just a dessert to me—it’s a way to connect with my heritage and share the richness of Southern cuisine. My banana pudding recipe is always a hit at gatherings and dinner parties. Here’s why:
- It’s delicious: The combination of creamy pudding, sweet bananas, and crunchy vanilla wafers is a match made in heaven.
- It’s customizable: Add your twist using different milks or a sprinkle of nutmeg.
- It’s easy to make: This recipe is a breeze to prepare with just a few simple ingredients, including banana pudding ingredients like sliced bananas and vanilla wafers.
What Makes This Version Unique
My banana pudding recipe stands out because of the special vanilla wafers I use—crunchy on the outside and soft on the inside. I also enhance the flavor by adding a hint of cinnamon to the pudding. This unique combination creates a dessert that feels both familiar and innovative, offering a fresh and delightful twist on a classic favorite.
Essential Tools and Equipment for Perfect Banana Pudding
You’ll need some key tools and equipment to make a delicious banana pudding. The right tools ensure your banana pudding recipe turns out just right. Let’s look at what you need to make easy banana pudding.
Here’s a list of the must-have tools and equipment:
- A large bowl for mixing the pudding
- A whisk for blending the ingredients
- A baking dish for assembling the banana pudding
- A measuring cup for accurate measurements
- A spoon for serving
With these tools, you’re ready to make the perfect banana pudding. Remember, the right tools are key to great results. Using these essentials, you’ll create a tasty and easy banana pudding that will wow everyone.
| Tool/Equipment | Description |
| Large Bowl | For mixing the pudding ingredients |
| Whisk | For blending the ingredients together |
| Baking Dish | For assembling the banana pudding |
Gathering Your Banana Pudding Ingredients
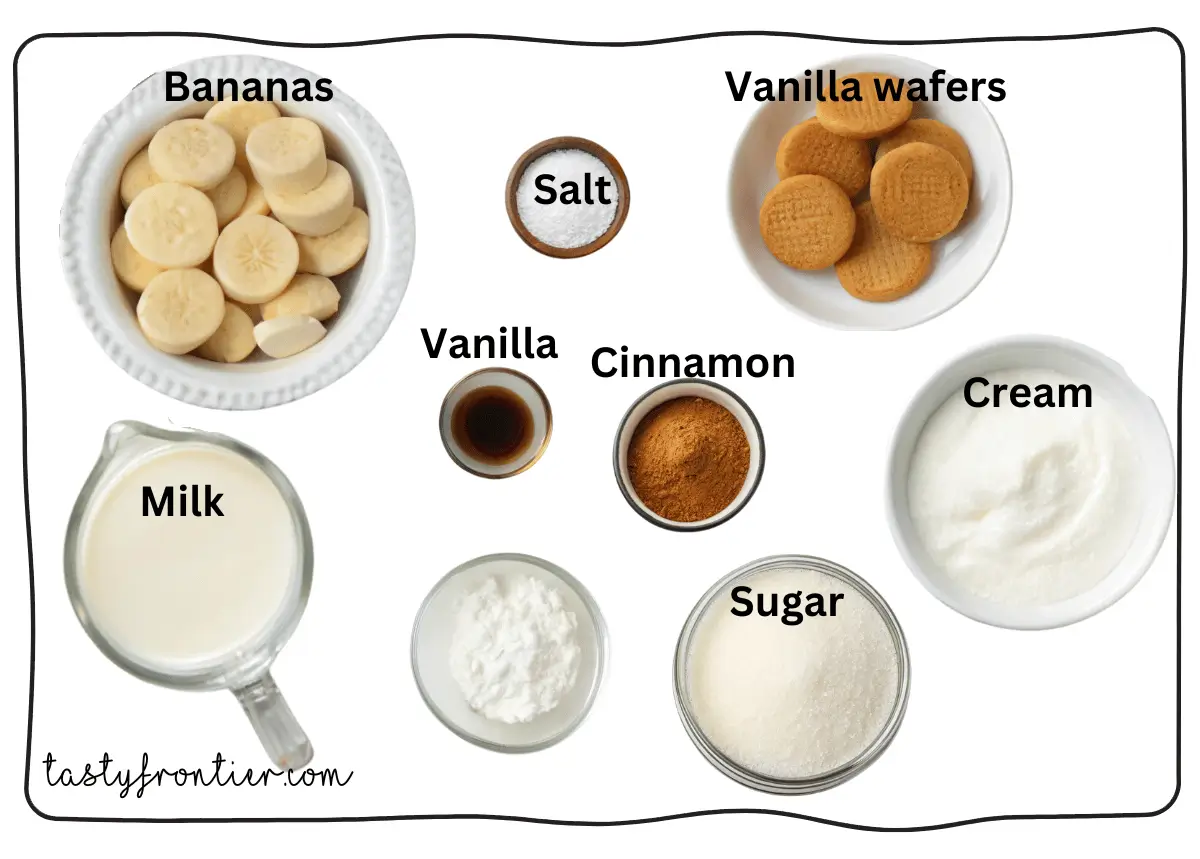
Selecting the proper vanilla wafers is crucial, as they significantly impact the flavor and texture of the dish. The quality of the ingredients plays a key role in determining the taste and texture of the banana pudding. Therefore, choosing the right ingredients is essential for making a great banana pudding.
Before I start making banana pudding, I select the best bananas. I look for ripe bananas with a few brown spots because they are sweeter and add natural sweetness to the pudding. Next, I choose high-quality vanilla wafers known for their excellent flavor.
Selecting the Perfect Bananas
When picking bananas, keep these tips in mind:
- Look for ripe bananas with a few brown spots
- Choose bananas that are firm but not too green
- Avoid bananas with bruises or soft spots
Choosing the Right Vanilla Wafers
For the best banana pudding, use high-quality vanilla wafers. Here’s what to look for:
- Look for wafers with a delicate flavor and texture
- Choose wafers that are made with real vanilla
- Avoid wafers with artificial flavors or preservatives
By choosing the right ingredients, including ripe bananas and quality vanilla wafers, you’re on your way to a delicious banana pudding. Don’t forget to pick the best pudding ingredients to complete your banana pudding with vanilla wafers.
For more tips on working with pantry staples, check out our How to Make Bread Crumbs: Guide—it’s a great resource for baking essentials
Making the Creamy Vanilla Pudding Base
To make a tasty banana pudding, you need a creamy vanilla base. This base is key to the easy banana pudding recipe. I use top-notch ingredients like pure vanilla extract and whole milk for a smooth texture.
Here’s how to make the creamy vanilla pudding base:
- Mix 2 cups of milk, 1/4 cup of sugar, and 1/4 teaspoon of salt in a medium saucepan.
- Heat it over medium heat, stirring now and then, until the sugar dissolves and it’s hot but not boiling.
- In a small bowl, whisk two tablespoons of cornstarch and two tablespoons of cold milk until it’s smooth.
- Slowly add the cornstarch mix to the saucepan, whisking to avoid lumps.
- Cook for another 2-3 minutes or until the pudding thickens.
This banana pudding recipe is a classic. The creamy vanilla base is what makes it great. Following these steps, you can make a delicious banana pudding that everyone will love.
Here are some tips for making the creamy vanilla pudding base:
- Choose high-quality ingredients, like pure vanilla extract and whole milk, for the best taste and texture.
- Whisk constantly when adding the cornstarch mix to avoid lumps.
- Cook the pudding base over medium heat, stirring to prevent burning.
| Ingredient | Quantity |
| Milk | 2 cups |
| Sugar | 1/4 cup |
| Salt | 1/4 teaspoon |
| Cornstarch | 2 tablespoons |
| Pure vanilla extract | 1 teaspoon |
The Art of Layering Your Banana Pudding
Mastering the art of layering is key to creating a stunning banana pudding, as it is crucial for both the appearance and the taste. Begin with a solid base, typically consisting of vanilla wafers, sliced bananas, and a sprinkle of spices such as nutmeg or cinnamon.
For a beautiful pudding, balance is essential. After the base, alternate vanilla wafers, bananas, and pudding layers. This makes the dessert both pretty and easy to serve. For the best taste, use fresh ingredients instead of store-bought mixes.
Creating the Perfect First Layer
Begin with vanilla wafers in a large dish. Trim them if needed. Then, layer sliced bananas on top. Add a pinch of nutmeg or cinnamon for extra flavor.
Stacking Additional Layers
After the first layer, continue building by adding more layers of vanilla wafers, bananas, and pudding, finishing with a final layer of pudding on top. This technique ensures the dessert stays moist and creamy throughout.
Finishing Touches
To complete your pudding, add some flair. Use whipped cream, chopped nuts, or cinnamon. Fresh fruit like strawberries or blueberries can also add color and flavor. With these tips, your banana pudding will impress everyone.
| Layer | Ingredients | Instructions |
| First Layer | Vanilla wafers, sliced bananas, nutmeg or cinnamon | Arrange wafers in the bottom of a serving dish, layer bananas on top, and sprinkle with nutmeg or cinnamon |
| Additional Layers | Vanilla wafers, bananas, pudding | Repeat the process of layering wafers, bananas, and pudding, ending with a layer of pudding on top |
| Finishing Touches | Whipped cream, chopped nuts, cinnamon, fresh fruit | Add decorative touches such as whipped cream, chopped nuts, or fresh fruit to finish the dessert |
Chilling and Setting Tips for Best Results
To get the perfect banana pudding, chilling and setting are key. When you make an easy banana pudding recipe, chill it right. This makes the pudding creamy and smooth.
Here are some tips for chilling and setting your banana pudding:
- Refrigerate the pudding at 40°F (4°C) or below to keep it safe.
- Chill the pudding for 3-4 hours or overnight. This lets the flavors mix and the texture set.
- Use airtight containers to store the pudding. This keeps it fresh and prevents odors.
Follow these tips to make a delicious banana pudding. Use fresh bananas, vanilla wafers, and a rich pudding base for the best taste.
These chilling and setting tips will help you make a tasty banana pudding. It’s great for any occasion, whether you’re making a classic or a modern twist.
Modern Twists on Traditional Banana Pudding
I’m excited to share modern twists on banana pudding. The Chick-fil-A banana pudding milkshake is a hit. It mixes banana pudding’s creaminess with a milkshake’s ease, perfect for a cool treat.
Looking for banana pudding near you? You’ll find many options. There’s something for everyone, from traditional to the Chick-fil-A banana pudding milkshake. Whether you want a classic or something new, there’s a banana pudding for you.
The Famous Chick-fil-A Banana Pudding Milkshake Version
The Chick-fil-A banana pudding milkshake is a game-changer. It has a rich banana pudding base, whipped cream, and nutmeg. It’s a mix of flavors and textures that you must try.
No-Bake Variations
There are many no-bake banana pudding options. They’re great for hot days when baking is too much. Some favorites include:
- No-bake banana pudding parfaits with creamy pudding, bananas, and whipped cream
- Banana pudding popsicles are a fabulous treat for hot days
- No-bake banana pudding cheesecake with a creamy base and graham cracker crust
| Dessert | Ingredients | Prep Time |
| Chick fil a banana pudding milkshake | Banana pudding base, whipped cream, nutmeg | 10 minutes |
| No-bake banana pudding parfaits | Creamy pudding, fresh bananas, whipped cream | 15 minutes |
| Banana pudding popsicles | Banana pudding base, popsicle sticks | 20 minutes |
Troubleshooting Common Banana Pudding Problems
You might encounter some common issues when making your favorite banana pudding. I’ll share some tips to help you fix these problems. With the right ingredients and a bit of patience, you can make a delicious dessert.
Some common banana pudding problems include bananas turning brown, pudding being too runny, and texture issues. To avoid these, use fresh ingredients and follow the recipe closely. Here are some tips to help you troubleshoot:
Preventing Banana Discoloration
To stop bananas from turning brown, use ripe but firm ones. Handle them gently. Sprinkle a little lemon juice on them to prevent browning.
Fixing Runny Pudding
If your pudding is too runny, chill it for a few hours. This will help it set. You can also add more cornstarch or flour to thicken it.
Addressing Texture Issues
To fix texture issues, cook the pudding over low heat while stirring constantly to help it thicken properly. If needed, adding more milk or cream can also help achieve the desired consistency. By following these tips, you can create a delicious banana pudding. Remember to use fresh ingredients and carefully follow the recipe for the best results.
Storage and Make-Ahead Instructions
To keep your banana pudding fresh, follow proper storage methods. Use airtight containers to prevent air from spoiling it. Glass containers with tight-fitting lids work well.
Keep banana pudding away from strong-smelling foods. It can easily absorb odors. Store it in the refrigerator for up to 3 days. Prepare the pudding with a more extended storage g base up to 2 days before. Then, assemble the pudding just before serving.
Proper Storage Methods
Here are some tips for storing banana pudding:
- Use airtight containers to prevent air from getting in and spoiling the pudding.
- Keep the banana pudding away from strong-smelling foods.
- Store the banana pudding in the refrigerator at a temperature of 40°F (4°C) or below.
How Long It Lasts
The shelf life of banana pudding depends on storage. If you use fresh ingredients, it lasts up to 3 days. Here’s a table summarizing storage options:
| Storage Method | Shelf Life |
| Refrigerator | Up to 3 days |
| Freezer | Up to 2 months |
By following these tips, you can enjoy your banana pudding longer. Whether it’s classic or modern, proper storage keeps it fresh.
How to Serve Your Homemade Banana Pudding
When serving your homemade banana pudding, presentation matters a lot. You want your easy banana pudding to look great. Choose a beautiful serving dish to show off your dessert. A glass or crystal bowl adds elegance.
To serve, scoop the pudding into cups or bowls or make a big dish for everyone. For a rustic look, use mason jars or small ceramic containers. Don’t forget to garnish with nutmeg or sliced bananas for color and freshness.
Here are some tips for serving your banana pudding:
- Always use top-quality ingredients when making banana pudding for the best taste and texture.
- Add whipped cream or chopped nuts for extra flair.
- Chill the pudding in the fridge for 30 minutes before serving to blend flavors.
Follow these tips and use a tasty banana pudding recipe. You’ll make a stunning and delicious dessert that will wow your guests.
Why This Recipe Will Become Your Go-To Dessert
This classic Southern banana pudding recipe is set to become your favorite dessert. It’s all about the quality ingredients and the careful layering. This creates a creamy, decadent treat that beats any store-bought version.
The secret to this recipe is the attention to detail, from choosing the right vanilla wafers to arranging the layers perfectly. With some practice, you’ll impress everyone with your baking skills. This recipe is easy to make so that you can enjoy the process.
Make this your signature banana pudding recipe. Its unbeatable flavor and creamy texture will make it a hit at any gathering. Get ready to enjoy the classic Southern taste in every bite.
PrintBanana Pudding Recipe
This Classic Southern Banana Pudding is a rich, creamy, and comforting dessert layered with vanilla wafers, sweet bananas, and a luscious homemade vanilla pudding. It’s the perfect treat for any occasion, combining tradition with simplicity to create a dessert that never goes out of style. With a touch of cinnamon and whipped cream, this recipe is destined to be a favorite in your home!
- Prep Time: 20 minutes
- Cook Time: 15 minutes
- Total Time: 35 minutes
- Yield: One 9x13-inch dish of banana pudding 1x
- Category: Dessert
- Method: No-Bake (Assembly) or Stovetop (Pudding Preparation)
- Cuisine: Southern
- Diet: Vegetarian
Ingredients
- For the Vanilla Pudding:
- 2 cups whole milk
- 1/4 cup granulated sugar
- 1/4 teaspoon salt
- 2 tablespoons cornstarch
- 2 tablespoons cold milk (for mixing cornstarch)
- 1 teaspoon pure vanilla extract
- 1/4 teaspoon ground cinnamon (optional)
- For the Layers:
- 4–5 ripe bananas (sliced)
- 1 box (12 ounces) vanilla wafers
- Whipped cream (for topping)
- Optional: Chopped nuts, a sprinkle of nutmeg, or fresh fruit for garnish
Instructions
Prepare the Vanilla Pudding:
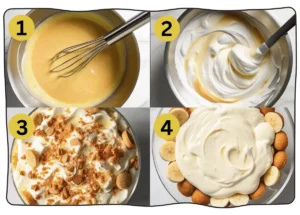
- In a medium saucepan, combine 2 cups of milk, sugar, salt, and cinnamon (if using). Heat over medium heat, stirring occasionally until the sugar dissolves and the mixture is warm (do not boil).
- In a small bowl, whisk cornstarch with 2 tablespoons of cold milk until smooth. Slowly pour this mixture into the saucepan while whisking continuously to avoid lumps.
- Cook for 2-3 minutes or until the pudding thickens. Remove from heat, stir in vanilla extract, and let it cool slightly.
Assemble the Banana Pudding:
- In a large baking dish or serving bowl, arrange a layer of vanilla wafers at the bottom.
- Top with a layer of sliced bananas.
- Pour a layer of pudding over the bananas, spreading it evenly.
- Repeat the layers of wafers, bananas, and pudding until all ingredients are used, ending with a layer of pudding on top.
Finish and Chill:
- Add whipped cream as the final topping and garnish with chopped nuts, a sprinkle of nutmeg, or fresh banana slices for decoration.
- Cover the dish with plastic wrap and refrigerate for at least 3-4 hours or overnight to let the flavors meld and the pudding set.
Serve:
- Serve chilled in individual bowls or glasses. Enjoy this creamy, nostalgic dessert!
Notes
- For a no-bake version, use instant pudding mix and skip the stovetop pudding preparation.
- To prevent bananas from browning, lightly toss them with lemon juice before layering.
- This dessert tastes even better the next day, as the flavors fully meld together.
- Use mason jars or individual ramekins for a fun, portable serving option.
Keywords: Classic Southern Banana Pudding
Frequently Asked Questions: Perfecting Your Banana Pudding Recipe
What are the ingredients in a banana pudding?
Banana pudding typically includes ripe bananas, vanilla pudding, vanilla wafers, milk, sugar, eggs or cornstarch (for scratch-made pudding), and vanilla extract. Optional toppings like whipped cream or cinnamon can add extra flair.
How can you keep bananas from turning brown in banana pudding?
To keep bananas fresh, lightly coat the slices with lemon or lime juice. The acidity prevents oxidation, which causes browning, without affecting the flavor significantly.
Can I use sweetened condensed milk instead of milk for pudding?
Yes, you can use sweetened condensed milk for a richer, sweeter pudding. However, reduce or omit additional sugar since condensed milk is already very sweet.
What can you use in banana pudding instead of wafers?
You can substitute vanilla wafers with graham crackers, shortbread cookies, or even sponge cake for a unique twist while still maintaining the pudding’s texture.
How is pudding made from scratch?
Pudding from scratch combines milk, sugar, a thickener like cornstarch or egg yolks, and flavoring like vanilla. Simmer the mixture over medium heat, whisking until it thickens, then let it cool before layering.
What ingredients are in Patti LaBelle’s banana pudding?
Patti LaBelle’s banana pudding often includes vanilla pudding mix, sweetened condensed milk, cream cheese, whipped topping, ripe bananas, and vanilla wafers. Her recipe is known for its extra creamy and decadent texture.

